SHOWTEC Phantom 250 Spot User's Guide Page 10
- Page / 25
- Table of contents
- TROUBLESHOOTING
- BOOKMARKS
- Phantom 250 Spot V4 1
- Showtec 3
- WARNING 4
- OPERATING DETERMINATIONS 6
- Return Procedure 7
- Description of the device 8
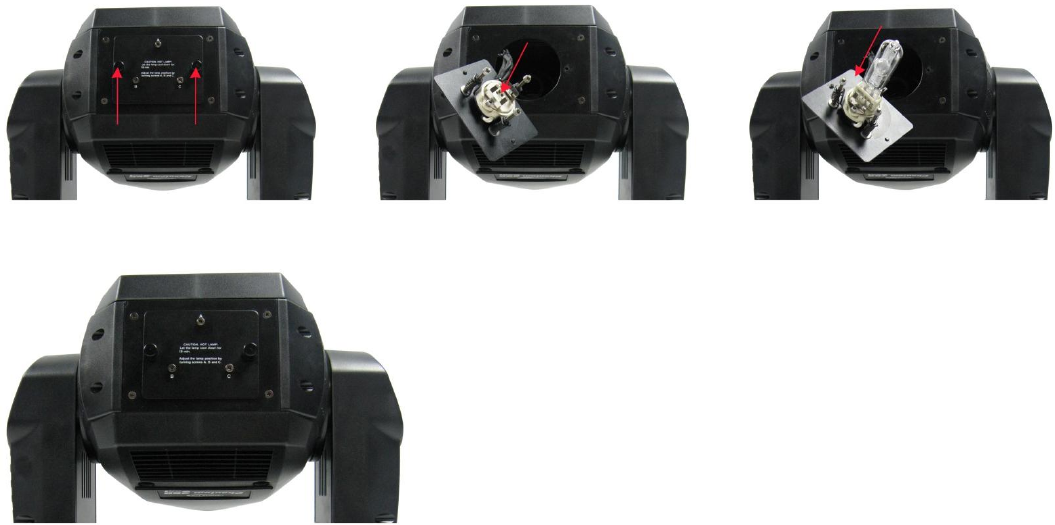
- Installation 10
- A 10
- B C 10
- Set Up and Operation 11
- Control Panel 16
- Control Mode 16
- Menu Overview 18
- Navigating through the menu 19
- Calibration Options 19
- User Modes 19
- Channels settings 20
- Maintenance 20
- Fig. 8 21
- Troubleshooting 22
- Product Specification 24
Related products and manuals for Floodlights SHOWTEC Phantom 250 Spot

 (15 pages)
 (10 pages)
(19 pages)
(10 pages)
(10 pages)
(19 pages)
© 2020, manymanuals.com. All rights reserved. | 1.069 s |
 Manymanuals.com
 Manymanuals.de
 Manymanuals.fr
 Manymanuals.it
 Manymanuals.pl
 Manymanuals.cz
 Manymanuals.es
 Manymanuals-pt.com
Comments to this Manuals